Door Repair

This is an excerpt from the Book called “Carpentry by Des Moines, Iowa. Continue reading to learn more about Door Repair, thanks to the author.

Door problems can occur at the hinges, the latch, the jamb and stop, or the whole door itself. These two pages describe repairs that you can make with the door left in place. If the door binds and the hinge or the stop is not the cause, you will need to plane or cut it. 

Start With The Hinge 

When analysing a malfunctioning door, always examine the hinges first. 

Squeaks: Oil a squeaky hinge, using lightweight oil. Open and close it a few times, and oil gain. If it still squeaks, pop out the pin and clean away all rust on both the pin and the hinge leaves. 

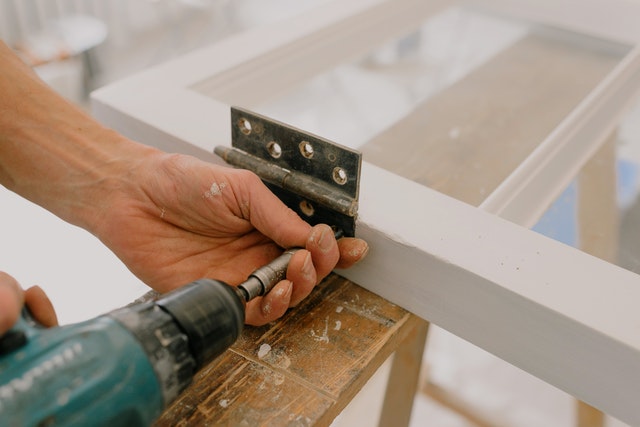
Loose hinge: If a door sticks or won’t close, perhaps the problem is a loose hinge. Grasp the door handle and pull up as you look at the hinges. If one is loose, refastening it may solve your problem. But before you re-anchor the hinge, see if there is a reason it has come loose. The hinge leaves should be set flush with the jamb or the door edge; if one is sunk below the surface, the door will have trouble closing and you will be pulling it outward every time you close the door. Support the door, remove the screws from the leaf, and insert a cardboard shim or two until the leaf sits flat and flush.

If the door binds because the stop needs to be moved or because it is rubbing against the jamb, fix the problem before reattaching the hinge. 

A hinge screw driven in at an angle will protrude, causing the hinge to bind. Remove the screw, fill the hole with a whittled piece of wood, drill a pilot hole, and drive the screw straight. 

Or, the hinge may have come loose because the edge of the door rubs against the door stop near the hinges. If so, plane the door or move the stop over. 

Start With The Hinge 

To refasten the hinge more securely, remove one of the screws and try driving in a longer one. Sometimes you need a very long screw-as long as 3 inches-in order to reach the framing. Repeat the process with the other screws. 

Or, wedge a piece of wood into each hole so the screw will fit more tightly. Support the bottom of the door, remove all the screws from one leaf, and fold the leaf back. Whittle plugs of wood to fit fairly tightly, squirt in some carpenter’s glue, and tap in the plugs. Drill pilot holes before driving the screws back in. 

Strike Plate 

If your door closes but does not latch, the latch bolt is not entering the hole in the strike plate. Watch it closely as you close the door to find the problem. 

If the strike plate is too far away, use cardboard shims to bring it out. If the strike plate is too high or too low, remove it, mortise out for the new position, drill pilot holes, and refasten the strike. Use wood putty to fill any gaps. 

Door Stop 

The door may have trouble latching because is warped, so it does not meet the door stop all along its length. If the door is obviously warped, replace it. For a minor problem, pry out the door stop, close the door, and reinstall the stop so it fits snugly with the door at all points. After you do this, the face of the door may not be flush with the edge of the jamb, but that is usually not very noticeable. 

Sometimes a door can bind because it rubs against the door stop on the hinge side of the jamb. Try tapping the stop over slightly using a hammer and a block of wood. If such subtleties fail, then remove and reposition the stop. 

Door Moves By Itself 

A door that moves by itself isn’t haunted; the hinges are simply out of plumb. Hold a level-or a straight board with a level clamped to it- against the pin sides of both hinges. The hinges should be closer to perfectly plumb. 

If the hinges are out of plumb, unscrew one hinge and move it out. Drill pilot holes before refastening. Check the hinges for plumb. If they line up, fill the resulting mortise gap with wood putty. 

The flat side if the jamb will rarely be out of plumb. This requires a more complicated fix: You’ll have to remove the casing and adjust the jamb. You’ll probably also need to adjust the jamb all the way around so the door will fit into the opening. 
Planning And Cutting A Door 

Removing and shaping a door is not as difficult as the job may sound. However, take great care when marking and cutting because once wood is removed from the edge of a door, you can’t fill it in again. 

Marking or scribing 

If your door sticks or does not close, and the steps do not solve the problem, it’s time to mark the door for cutting or planning. If the door sticks only a little, or sticks only during humid weather, close it all the way and find the trouble spots. Insert a piece of thin cardboard between the door edge and the jamb, and slide it along the sides and top of the door. Wherever the cardboard sticks, draw a pencil line on the door so you will know where to plane. If the door sticks tight or is difficult to close, shut it gently until it just starts to bind. (If you force the door shut, you will have inaccurate scribe lines.) From the inside of the door, scribe a line, using the door jamb as the guide. Hold the pencil flat against the jamb so it stays at the same angle while you slide it along. The resulting line will reveal the exact outline of the jamb on the door.  

If the door binds at its bottom (as often happens when new carpeting is installed), first decide how much of a gap you want between the door and the floor or threshold. Interior doors usually have a gap of about ½ inch; an exterior door must be tighter, and it might need to fit snugly against a rubber gasket in the threshold. Scribe a line that matches the floor or threshold, using a scrap of ½-inch plywood on the floor as a guide. 

Planning 

Remove the door, supporting it at the bottom with shims so it is firm but not tight. Use a hammer and screwdriver to trap the top hinge pin loose; then tap the bottom pin loose. Remove the top pin, then the bottom pin. If the hinge is old and rusted and the pin won’t come loose, remove the screws attaching the hinge to the door. 

Moving a latch is a difficult job. So, if you scribe marks show that you need to remove 1/8 inch or more from the area around the latch, cut the hinge side instead; remortising the hinges will not be as difficult. Use a straightedge to transfer your scribe lines to the hinge side. 

Position the door so it will be stable and easy to work on. To plane an edge, lean it against a table and brace the bottom. To plane a top or bottom, clamp it so it overhangs a table. If you need to remove a lot of material, buy or rent a power planet. 

Cutting A Door
Cutting A Door
Planning a door 
Planning A Door

When planning across the grain, or when planning a door that has plywood veneer, clamp a straightedge and use a knife to cut a line that is 1/6 inch behind your scribe line. This should prevent any splintering on the face of the door. 

For planning techniques. If the edge of the door is slightly bevelled, maintain that bevel as you plane. It often helps to straddle the door when planning a door edge. If you can see the wood grain, plane with the grain lines going upward ahead of you. If you can’t see the grain, you’ll have to experiment: If the plane is gouging, try moving in the opposite direction. 

Cutting A Hollow-Core Door 

A hollow-core door is reinforced with solid wood for only an inch or so around its perimeter. So, if you have to cut off more than an inch, you will have to fill in a hollow space. 

Use a straightedge and knife to cut all the way through the veneer about 1/16 inch behind the curt line. Then, clamp on the straightedge as a guide for cutting the door with a circular saw. Save the cutoff. 

Use a chisel to scrape and push away the cardboard reinforcement in the opening. Chisel; away the veneer from the cutoff piece and pry off the little side pieces. Test to see that the board will fit in the opening. Squirt wood glue on the side of the door and on the wood piece, tap into place, and clamp. 

Cutting A Door 

  1. First, cut a knife line slightly back of the cut line so there will be no splinters. Check for embedded nails and remove them or drive them in with a nail set. 
  2. Cut the door with a carbide-tipped blade. Use a clamped straightedge as a guide for your circular saw. 
  3. Use a chisel to trim away the veneer from the piece you cut off. Sand it smooth with sandpaper. 
  4. Finally, apply wood glue to the top and bottom of the piece and slip it into the cavity of the door. 

Fixing A Flush Door Or A Panel Door 

A flush door has a smooth face; a panel door is made of horizontal and vertical rails, with panels that fit into them. 

If the laminate facing of a flush door is peeling off, fix it right away or the problem will get worse. Remove the door, squirt in carpenter’s glue, and clamp overnight. Sand off any rough edges that could get caught and cause further peeling. 

If a panel door has come apart, remove it and see it on sawhorses or a workbench. Use bar clamps or pipe clamps to squeeze the door back together; you may find that you have to scrape away stuck-on debris or paint. Once you know that it will go back together, use a flat bar to pry the pieces far enough apart so you can squirt glue in all the joints. Clamp firm for a day. If the door is badly damaged, it may help to drill angled pilot holes and drive screws at the top and bottom, to hold the vertical and horizontal rails together.