

This is an excerpt from the Book called “Home Improvement”. Continue reading to learn more about BATHROOMS, thanks to the author.
A successful bathroom design reflects the lifestyle of its users. A bathroom for adults with identical schedules needs to be laid out differently than one used by children or occasional guests.
Design your bath around family needs and schedules. Are people always waiting for someone to get out of the bathroom? Is there enough room for two people? How often is the tub used? Can guests get to the bathroom without going through someone’s bedroom?
Here are some fine points to consider in your design.
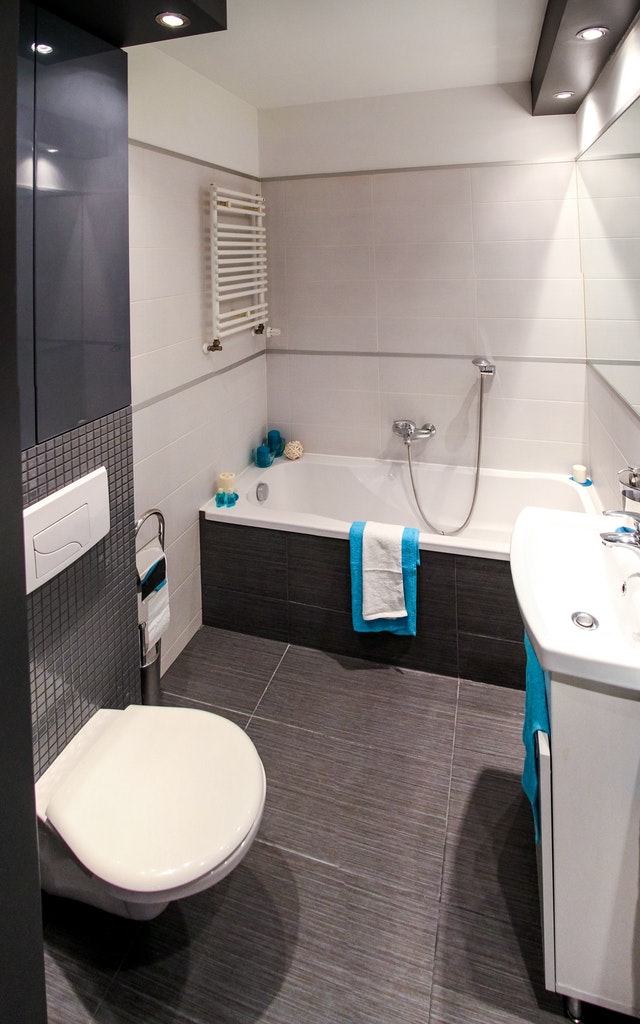
A bath with a tub, toilet, and two lavatories requires a minimum of about 50 square feet of floor space. But why settle for the minimum? In some respects the bathroom is the most important room in the house. To feel minimally luxurious, a bathroom requires 80 square feet—and 100 square feet is better. Even if you cannot move major walls, there are still ways to add space.
There will be space for storage and the bathroom will feel larger if you convert closet space from an adjoining room into a bathroom cabinet with open shelves and a counter.
Change a hinged door into a sliding pocket door (not to a bearing wall, however). Even though it requires tearing out a portion of an existing wall, it may be worth the effort if you are remodelling extensively. Before proceeding, check to see if you will have to move any plumbing or wiring.
Install a bay (or greenhouse) window with a window seat. These additions add both space and light and don’t need new foundations or major structural changes.
Eliminate interior walls. For instance, if the bathtub does not take up an entire wall and needs to be enclosed at one end, build a low divider, rather than a full height wall. Before proceeding, check to make sure the existing wall isn’t a bearing wall.
Let in the light. Natural daylight makes a bathroom appear larger and helps it stay dryer. If there is a window above the tub or shower, use a transparent or translucent shower curtain or shower door to let in the light. Install a large mirror on one will to reflect light, or flood the room with sunshine by installing a skylight overhead.
Put a bathtub (or a vanity) in the bedroom. You’ll have to move and add plumbing and vents, but you’ll free up space in the bathroom. You’ll also take the burden off family bathroom schedules.
Finally, particularly if you live in a southern climate, consider incorporating outdoor space into a ground-level bathroom design. Install an outdoor shower and/or hot tub accessible through a patio door.
These six plans show what you can do to a bathroom without moving the main structural walls or the toilet. The first five plans also manage to retain the original lavatory drains. The original bathroom was similar to Plan 1, except that it backed up to a deep hallway linen closet and had an in swinging door. There was no shelving and only one washbasin.
Need: provide two washbasins, an enlarged floor area, and increased storage within the bathroom.
Solution: The hinged door is replaced by a pocket door. The hallway linen closet is replaced with a new storage unit within the bathroom. The original closet wall in moved to allow for a vanity with two basins. A narrow shelf unit on the back of the bedroom closet creates floor-to-ceiling storage. The original tub is still suitable and therefore remains.
Need: Because the parents and children share this bathroom there is a need for separate entrances and separate mirrors.
Solution: The original bedroom closet is converted into a dressing room with access to the bathroom. The dressing room includes a full length, three-sided mirror and a dressing table. A new, enlarged bedroom closet replaces the old one. The door to the linen closet is moved around to the hallway side. The bathroom door now opens directly from the main hall. A shelf unit over the vanity provides towel storage in the bathroom while the shelf unit over the toilet provides storage for odds and ends.
Need: Two separate washing areas and plenty of floor space are needed in order to clear up a traffic jam at the washbasin in the morning.
Solution: The existing linen closet is retained but with a folding door. The bathroom door swings out to create more space. The bedroom closet is halved, and the bathtub is replaced with a shower to make space for a second lavatory. The custom vanity includes a basin, a lazy susan under the counter, and drawers underneath. A vanity in the opposite corner is set at the same angel as the shower front, with corner shelves above. A shelf unit is installed over the toilet.
Need: The children have grown up, and the bathroom needs to be converted into a spacious, relaxing room off the master bedroom.
Solution: The original bedroom closet is replaced with a whirlpool tub and a utility closet that opens into the hall. “A built in, cushioned bench is added, with a storage unit above for towels and linen. The old linen closet is replaced with a corner shower. The spacious vanity has one basin and extends over a new low-line toilet. A skylight and an open wall with a large window make the room very bright and sunny.
Need: Create a private and luxurious bathroom with access only from the master bedroom.
Solution: the bedroom closet is removed to make room for a sunken whirlpool bathtub. A new closet replaces the old one, and a built-in dresser unit is added. A pocket door leads to the bedroom. The original toilet is left in place, with storage above. A low divider between toilet and vanity creates privacy. The new vanity has two basins.
Need: the bathroom is shared by the family and needs to be divided into private compartments.
Solution: A shower compartment is created by removing the linen closet and vanity. The compartment includes towel bars, a bench with storage beneath, and a pocket door. The toilet is placed in a compartment with a cabinet. A new window provides more light. The new vanity and basin have narrow windows on either side. The original bedroom closet is replaced by a second vanity. A new pocket door opens to the bedroom. A storage drawer unit is added in the entryway.
Replacing or installing a new bathtub is a major project that usually involves framing, rough plumbing, fixtures, flooring, tiling, and accessories.
Although bathtubs come in various sizes, shapes, and materials, the techniques of installation are similar for all models. Most manufacturers also include detailed instructions with the tub.
Old-style bathtubs, made of porcelainized cast iron or enamelled steel, are still manufactured but due to their high price and difficulty of handling are losing ground to tubs made of acrylic and fiberglass reinforced plastics. Not only are the new materials lighter and less expensive, the are also more comfortable and warmer to the skin. Standard-size plastic tubs, preplumbed with massage pumps and jets, are becoming quite common.
Although plastic tubs are not as durable as cast-iron or steel tubs (plastic is vulnerable to scratches and dulling), they hold up well enough under careful use and can be buffed and polished to their original luster with auto-body polishing compound.

When selecting a new bathtub, first consider the available space. If you are replacing an older tub, your new one should have the same dimensions and the same drain outlet (left or right side). Most tubs—old or new—are 30 inches wide and 60 inches long, so matching the size should not be difficult. The height of the new tub can be different, depending on the depth of water you prefer.
If you are installing a new tub, there is a great variety of sizes and shapes to choose from ranging from little tubs, which can squeeze into a corner to giant tubs that could host a party.
If you are buying a tub that is larger than standard size, you may have to bring it into the space before you frame the last bathroom wall. Some tub-and-shower units come with separate tub and enclosure sections.
Also consider the weight of the tub and the location of its drain when framing the bathroom floor. Don’t cut away joists to accommodate the drain under a tub that may weigh 1,000 pounds when full of water.
Frist rough-in the supply plumbing. A typical supply consists of ½-inch cold-water and ½-inch hot-water pipes that connect to a mixing valve.
A short 1/2-inch nipple runs down from the valve to an elbow with a short stub, to which the spout will be attached. A second ½-inch pipe runs up from the mixing valve to the showerhead. By code, the mixing valve must protect against scalding by limiting the outflow to 120o F.
Make sure you don’t install the mixing valve upside down! The flow to the showerhead is usually less than that to the tub spout. Connected upside down, you will find it takes forever to fill the tub! Since you won’t get a chance to operate the shower until after the wallboard is in, you will be in big trouble if you find that you installed the valve upside down.
Next, rough-in the drain. Building codes require a 1 ½-inch drainpipe with a trap below floor level, with the inlet center4ed directly beneath the drain. It should have slip nut or other means to connect to the waste-and-overflow pipe tailpiece coming from the tub. Many plumbers install a 2-inch drain because it clogs less often. If you use 2-inch waste pipe, you will have to adapt the 1 ½-inch tailpiece to the 2-inch trap. Install the waste pipe and trap so that the tailpiece from the tub drain and overflow (one piece to be installed later)Is directly over the trap inlet.
Building codes require that bathtub drains with concealed trap joints be accessible through an access panel or other opening that measures at least a foot square. For tubs on the ground floor, the access can be from the basement or crawl space below. Just cut a 12*12-inch hole in the floor, under the drain location before you install the tub. If the bathroom is on a slab or an upper floor, build an access door or removable panel in the room behind the drain.
If the tub is acrylic or fiberglass, nail 2*4 flange-support cleats. Be sure these cleats are at exactly the right height and level. The manufacturer’s instructions will provide the proper dimensions. Cast-iron tubs don’t need these cleats.
Next, stuff unfaced fiberglass batts into the tub’s hollow cavities and between the wall and the tub. This will keep the bath water warm longer. The slide the tub into place and screw the vertical flange to the studs.
The tub itself does not come with any pipes, so you will have to purchase a tub drain assembly (drain arm, overflow pipe, connecting tee, and linkage). Spend the extra money for solid brass or Schedule 40 plastic rather than the bargain thin-walled plastic. The thin plastic unit won’t seem such a bargain when your drain clogs and the auger breaks it.
Assemble the unit according to the manufacturer’s directions and place it in position. You will need a helper to hold it from beneath. Put lots of plumber’s putty around the drain hole in the tub and screw in the strainer. Tighten it with the plastic-coated handles of a pair of pliers inserted in the strainer. Do not overtighten.
Install the overflow cover with the screws supplied. Then, working under the tub, connect the overflow to the trap by tightening the compression nut with a spud wrench or spanner. Test the drain with a few buckets of water. Finally, install the stopper mechanism.
Insulate and finish the walls around the tub with panels appropriate to the amount of moisture exposure. If you don’t have a showerhead, standard wallboard is fine, but moisture-resistant wallboard (green board) has a waterproof paper face and is better. For backing tile, use cement board, which is waterproof. Replace the stub-outs for the tub spout and showerhead with nipples of the right length, then screw on the fixtures.
The last step in installing a tub is to caulk all the joints. To make a neat joint between the tub and tile, lay masking tape along the edge of the tub. Apply the caulk, smooth it with a wet finger, let the caulk set, then pull up the tape to reveal a straight, clean line.